UPDATE: Please click here for a new, and better, approach to LAMP on your ARM (or really, any) ChromeBook
tl;dr: Skip to the step by step setup instructions.
This article explains how to get a fully functional LAMP stack running on a Samsung ARM-based ChromeBook. I’m indebted to many, many sources for pieces of what you’ll find below – please see the “References” section below for a complete list of sources used in this post.
Please note that this article is not for those who wish to boot (or dual-boot) a complete linux distribution on their ARM ChromeBook. For that, see this post about ChrUbuntu. There’s also this post about using an ARM ChromeBook as a development platform for Go, for those interested in that.
Background
One of my key projects at present is the Annotum project, a scholarly authoring and publishing platform built on WordPress. Most of my work is done on a PC. I use git to access the Annotum source code repository on GitHub, a local editor to edit php, css, js, and other files (I use notepad++), ‘office’ applications such as Excel and Word for documentation, and an image editor for logos and the like (I use Photoshop Elements on my PC).
For WordPress and Annotum development on my PC, I use a handy WAMP stack called Server2Go to run local instances of Apache, MySQL, and php; there’s even a packaged version of Annotum called Annotum2Go that I use for testing and local demos.
So, when I got my new ChromeBook a few weeks ago, I was interested to see how capable this small, light, and very inexpensive machine would be for my daily work. I loved the simplicity of both the hardware and software – it has great battery life, the performance is fast enough not to be noticeable, and the size and weight remind me of a Macbook Air (at around a quarter of the price). The ChromeBook is truly a joy to use in day-to-day web browsing, email, and other lightweight tasks. But what about as a software development workstation?
ChromeOS allows me to do much of my work out of the box: I can use Google Docs (or Office Web Apps) instead of Word and Excel, and Pixlr Editor for image editing. With developer mode enabled, I can even open a shell and edit local files using vim (albeit a very limited, minimal version included with ChromeOS).
I looked around for some browser/Chrome Apps that would edit text, but eventually settled on using VIM. VIM has a steep learning curve, but it is ubiquitous on linux systems and worth learning. However, as I got into the VIM tutorial, I realized that many of the nicer features of VIM (such as visual mode) are not included in the version compiled with ChromeOS.
On other linux distributions, I’d normally use a package management system such as apt-get, yum, or emerge, to get a more complete version of VIM installed, but ChromeOS does not include any such tool. I realized that if I could get a package mangement tool up and running, I could probably get not only VIM and git, but also Apache, MySQL, and PHP as well. So I set out to make this happen.
After a relatively short period of googling, I hit upon this gist, which is really the key to this whole approach. Rather than re-partitioning the drive and installing an entire OS including the boot/kernel portion, this approach let me keep all the cool ChromeOS stuff, while still accessing my ‘real’ development toolkit at the same time. I can’t thank chrisavl enough for this!
Project Objectives
- Retain access to ChromeOS features – run the Chrome browser and all other built in tools and features of ChromeOS
- Run a complete linux distribution, in particular one with a package management system
- Add development tools such as the full version of VIM, git, etc. Check out, edit, test, and commit code changes both locally and back to GitHub.
- Install and run a complete apache/mysql/php/smtp stack locally
- Install and run a local copy of WordPress
Step-by-step setup instructions
1. Set your ChromeBook to developer mode
- Hold down [esc] and [refresh] and tap the power button. This will bring up the scary ‘recovery’ screen.
- Press [ctrl+d] to go into developer mode (there’s no prompt – you have to know to do it). Note that all local settings and data will be wiped.
- After the machine reboots into developer mode, you’ll be at the scary ‘not verified’ startup screen. Wait 30 seconds for it to boot, or press [ctrl+d] to start immediately.
2. Set up a local arch linux environment
- Download
http://archlinuxarm.org/os/ArchLinuxARM-imx6-latest.tar.gz
- Press [ctrl+alt+t] to open the crosh shell, then type the following commands:
shell
cd /usr/local
sudo mkdir arch
sudo chown chronos.chronos arch
cd arch
sudo tar xzvf /home/user/*/Downloads/ArchLinuxARM-imx6-latest.tar.gz .
- Create a script containing the following commands (you can use vi which is already installed).
vi ~/go_to_arch.sh
Put the following commands into your script:
#!/bin/bash
# go_to_arch.sh - switch from ChromeOS to Arch Linux
if uname -a | grep -q SAMSUNG ; then
echo "Changing Root to Arch Linux"
sudo cp /etc/resolv.conf /usr/local/arch/etc/resolv.conf
sudo mount -o bind /dev /usr/local/arch/dev
sudo mount -t devpts -o rw,nosuid,noexec,relatime,mode=620,gid=5 none /usr/local/arch/dev/pts
# link to the chronos home so it's accessible from arch linux
# (including the Downloads folder)
sudo mount -o bind /home/chronos/user /usr/local/arch/root
sudo mount -t proc proc /usr/local/arch/proc
sudo mount -t sysfs sys /usr/local/arch/sys
sudo chroot /usr/local/arch /bin/bash
sudo umount /usr/local/arch/dev/pts
sudo umount /usr/local/arch/dev
sudo umount /usr/local/arch/proc
sudo umount /usr/local/arch/sys
sudo umount /usr/local/arch/root
else
# don't change to arch linux if it's already running!
echo "You're already running `uname -a`"
exit 0
fi
- Now you can enter arch linux from the ChromeOS terminal shell by typing
. ~/go_to_arch.sh
- After you run the script, you’ll be running arch linux, and most importantly you’ll have access to the pacman package installer.
- To exit arch linux, simply type
exit
to get back to the regular ChromeOS shell.
Note: if you want the home directory to be executable (for example, if you will be compiling programs or writing scripts and storing them there), you will want to add a line like the following to your .bashrc file:
sudo mount -i -o remount,exec /home/chronos/user/
See this gist for a more complete .bashrc example that I use.
3. Install the LAMP stack
Install Apache
Before installing any of the LAMP programs, update the package manager:
pacman -Syu
IMPORTANT: If you get errors running pacman, try enabling a different mirror.
Once the update is complete, we can install Apache:
pacman -S apache
Open up the apache configuration file:
nano /etc/httpd/conf/httpd.conf
Comment out the unique_id_module (you can use ctrl+w to find it quickly in nano):
#LoadModule unique_id_module modules/mod_unique_id.so
Restart Apache:
/etc/rc.d/httpd restart
Using Chrome (in another tab than the one running the shell), navigate to http://localhost – which should display an (empty) auto-index directory. Add a sample index page:
nano /srv/http/index.html
Include this text (or whatever you’d like):
<html><head><title>Welcome</title></head>
<body><h2>Hello World!</h2>
Welcome to Arch on ChromeBook!
</body></html>
Navigate to http://localhost/index.html to see the new page.
Install MySQL
pacman -S mysql
Start it up
rc.d start mysqld
Run the MySQL set up script:
mysql_secure_installation
Press [enter] when asked for the root password (which isn’t set yet), and enter a new root password if desired. After that it’s easiest just to say Yes to all the options. At the end, MySQL will reload and implement the new changes.
Install PHP
pacman -S php php-apache
Add php to the apache configuration file:
nano /etc/httpd/conf/httpd.conf
Paste in this text block within the config.
# Use for PHP 5.x:
LoadModule php5_module modules/libphp5.so
AddHandler php5-script php
Include conf/extra/php5_module.conf
Check the PHP setup with a phpinfo page. Create a new blank file:
nano /srv/http/info.php
The file should contain:
<?php phpinfo(); ?>
Save and Exit, then restart apache so that all of the changes take effect:
/etc/rc.d/httpd restart
And finally navigate to http://localhost/info.php to see the result.
IMPORTANT: if you will be installing WordPress (see below), you need to install and enable php-gd:
pacman -S php-gd
Update php.ini to enable gd:
nano /etc/php/php.ini
Uncomment the following line:
extension=gd.so
4. Install phpmyadmin and sSMTP
IMPORTANT: this is all wide open and may be insecure. This configuration is only appropriate for a local dev system that is appropriately firewalled. Use at your own risk, YMMV, etc.
Install phpmyadmin
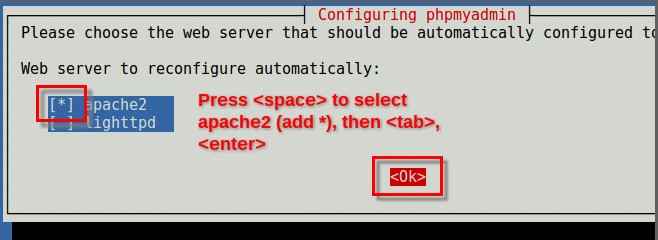
Install the phpmyadmin and php-mcrypt packages:
pacman -S phpmyadmin php-mcrypt
Configuration Copy the example configuration file to your httpd configuration directory.
cp /etc/webapps/phpmyadmin/apache.example.conf /etc/httpd/conf/extra/httpd-phpmyadmin.conf
Add the following lines to /etc/httpd/conf/httpd.conf:
# phpMyAdmin configuration
Include conf/extra/httpd-phpmyadmin.conf
Adjust access rights. To allow access from any host, edit /etc/webapps/phpmyadmin/.htaccess and change
deny from all
into
allow from all
Note security caveat from above!
Enable mysqli and mcrypt (if you want phpMyAdmin internal authentication) modules:
nano /etc/php/php.ini
Uncomment the following lines:
extension=mysqli.so
extension=mcrypt.so
Install sSMTP
sSMTP is a simple mail transfer agent or MTA – it will send, but not receive mail. I install it so that my WordPress installation can send mail (Annotum relies on email notifications for some workflow features).
These steps will enable sending mail via a Gmail account using sSMTP
pacman -S ssmtp
nano /etc/ssmtp/ssmtp.conf
Comment out everything, and add the following lines (thanks, Tombuntu!):
root=mygmailusername@gmail.com
mailhub=smtp.gmail.com:587
AuthUser=mygmailusername@gmail.com
AuthPass=mypassword
UseSTARTTLS=YES
Test sSMTP by sending a test message:
ssmtp recipient_email@example.com

To: recipient_email@example.com

From: myemailaddress@gmail.com
Subject: test email

hello world!
Note the blank line after the Subject, and finish with a [ctrl+d] to send. Check to see that you received the email. Note that the from address in the received email can be modified via the instructions found on this page (search for “Change the ‘From’ text”). Note that there are various other configuration options on that page, but I didn’t find any of them (apart from editing the ssmtp.conf file) to be necessary to get up and running on my ChromeBook.
5. Install and run WordPress
Create a database by navigating to http://localhost/phpmyadmin and logging in with ‘root’ and the password you created for the root user above. Click on ‘users’, ‘add a user’, name it, click the button to generate a password, and finally check the box to create a new database with the same name and grant all privileges. Copy the generated password for later use.
Once the db is created, get the latest WordPress:
cd ~
wget http://wordpress.org/latest.tar.gz
tar -xzvf latest.tar.gz
mv wordpress /srv/http
Navigate to http://localhost/wordpress and follow the prompts, first to create a configuration file, then entering the database information. Use the database and user names you created in phpmyadmin, and ‘localhost’ for the server. Finally, paste in the generated password.
Follow the rest of the WordPress installation, and soon you should be able to log into your new WordPress site on ChromeOS!
If you set up sSMTP correctly, you should also get an email at the address you gave for the admin user.
Note: if you cannot select different image sizes when attaching media to posts (e.g. you only see an option for “Full Size” and no “thumbnail” or “medium”) make sure you have installed and enabled php-gd as described above.
6. (optional) Install other tools using pacman
I use VIM and Git, so I install them with
pacman -S git vim
7. Finishing up
For my implementation, I like to manually start and stop apache and mysql, so I wrote this easy pair of scripts to do that:
#startem.sh - starts Apache and MySQL
rc.d start mysqld
/etc/rc.d/httpd restart
#stopem.sh - stops Apache and MySQL
rc.d stop mysqld
/etc/rc.d/httpd stop
References
Many, many thanks to the creators and maintainers of the following resources, without which this page would not exist.
Questions, comments? Please contact me @gcto, comment here, or use the contact form above.
Happy LAMPing!